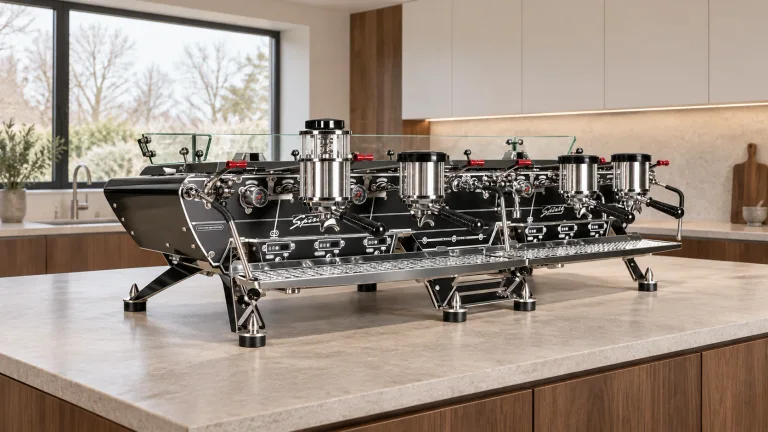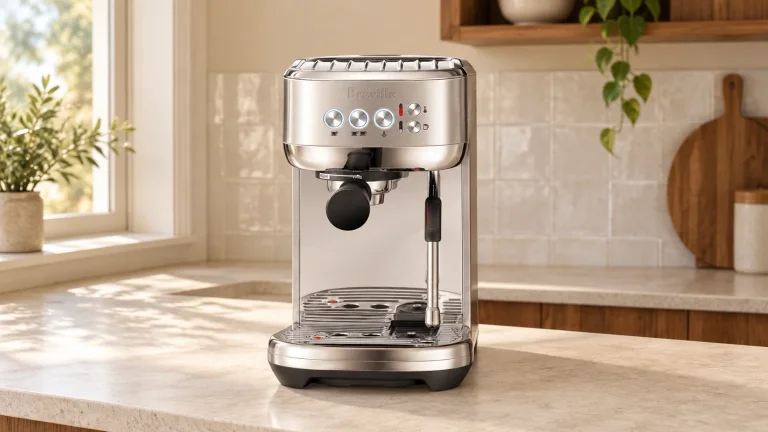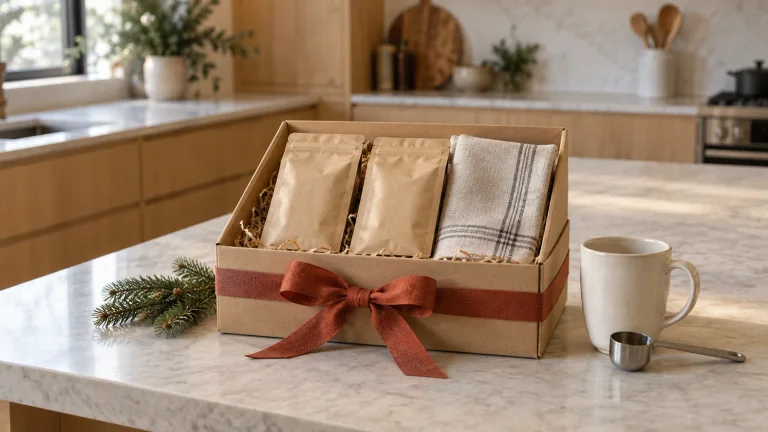
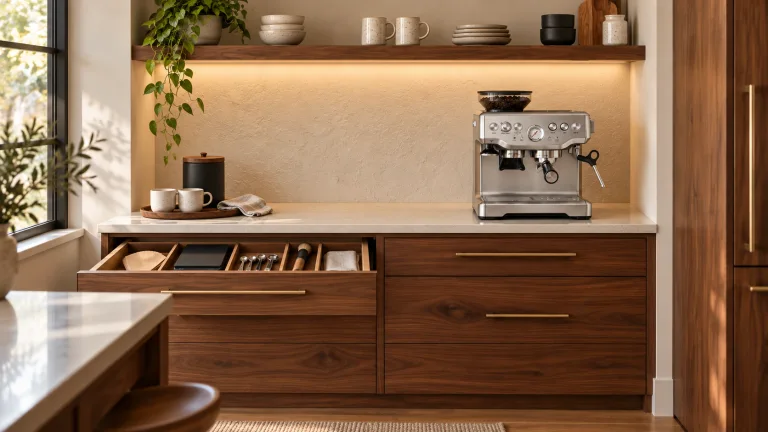
The best coffee bar cabinet is the one that makes your whole routine easier: a steady worktop, a drawer that opens all the way, a proper home for cups and beans, and enough empty space to prepare a drink. For a permanent espresso corner, start with kitchen base cabinets or a carefully specified custom cabinet. A shallow sideboard can suit a small manual setup, but a handsome front doesn't make it a good workbench.
At Coffee Corner, this is the station we'd design around: warm materials, one well-chosen brewing setup, useful drawers and a clear preparation area. Here's how to specify the furniture and fill it thoughtfully. If you're still choosing where it belongs, start with our coffee corner layouts.
What a complete coffee corner should have
A stable, wipeable surface with room to weigh, prepare and set down a cup.
Daily tools in the first drawer; cups and supplies below; cleaning products separately.
Good light, materials you like touching and cups you actually use.
Keep the brewer to one side of the worktop and leave a continuous preparation area beside it. Put the tools below that area, rather than under the machine where you have to step sideways each time. A small serving tray can group cups at the other end, but it shouldn't occupy the only space available for making coffee.
For an espresso station, that means room for the portafilter, scale and milk pitcher while they're in use—not just room for the machine's feet. For a manual station, it means a safe spot for the kettle, a sturdy mug and somewhere to put the wet brewer afterward. You shouldn't have to move a decorative vase to finish a drink.
The best finishing touch is often restraint. A good cup, an opaque coffee canister and a well-lit backsplash do more for the corner than a collection of gadgets with no everyday job.
Choose the cabinet around the job
Kitchen base cabinets
Choose for: a permanent station with substantial equipment, useful worktop depth and several drawers.
You can choose the drawer arrangement before buying the top. Allow for installation, wall fixing, end panels, handles and the worktop—not just the cabinet box.
A custom coffee cabinet
Choose for: an awkward alcove, a particular finish or a drawer interior built around your tools.
Ask for a dimensioned drawing and a complete hardware schedule. A beautiful front is only part of the commission; the inside should be just as carefully planned.
A freestanding sideboard
Choose for: a lighter setup when its depth, height and documented load limits suit the equipment.
Inspect drawer travel and usable interior dimensions. A wide cabinet can still have surprisingly short drawers and a shallow top.
A useful modular starting point: IKEA SEKTION / MAXIMERA
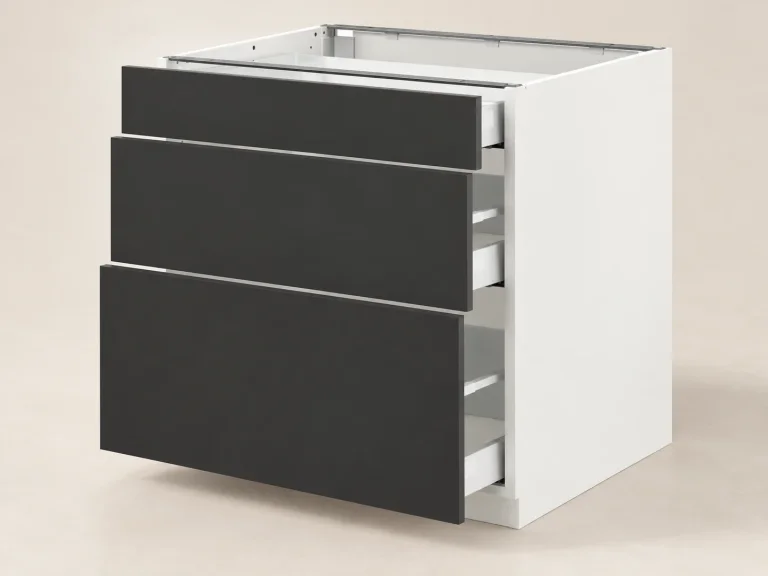 AI
AIThe 30-inch SEKTION / MAXIMERA with NICKEBO fronts is a useful example of what to look for: three drawer depths, full-extension runners and built-in closing dampers. Its frame is 30 inches high, with a 24-inch system depth; the listed overall depth is 24¾ inches. Those are cabinet dimensions, not finished counter height.
IKEA requires wall anchoring and sells the suspension rail, legs and plinth separately. Add the worktop and handles to your plan. The practical appeal is the configurable drawer system, not a claim that this unfinished unit is a complete coffee bar. Check every component's availability before booking installation.
For custom cabinetry, ask the maker to demonstrate the proposed drawer hardware with the load you expect to store. Blum's AMBIA-LINE illustrates the idea of adjustable internal compartments, but it belongs to compatible LEGRABOX and MERIVOBOX systems; it isn't a universal insert for any drawer. A simpler removable divider can work well too.
The coffee drawer: design it before you order
A coffee drawer should open in one movement and show you everything you need. Full extension matters because the back should be usable, not a hiding place. Soft closing is pleasant, but clear access, a suitable load rating and enough internal height matter first.
 AI
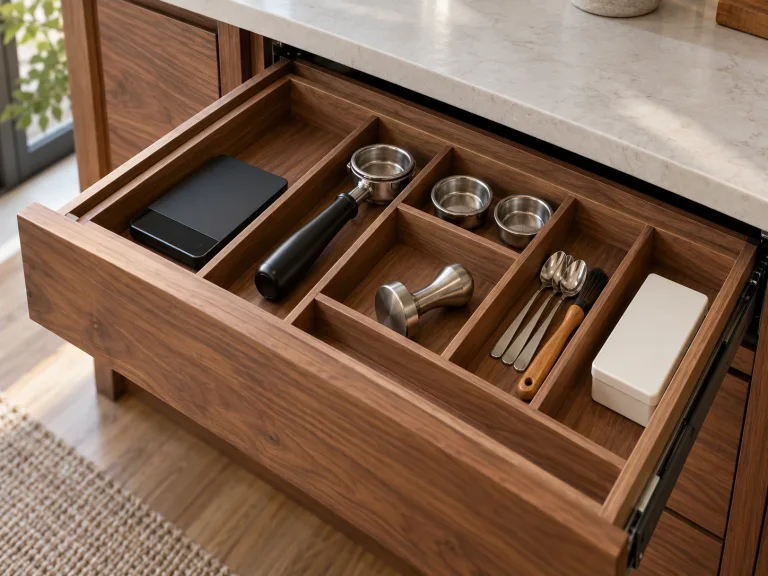
AITop drawer: the daily tools
Before buying an organizer, lay your actual tools on paper in the order you use them. Measure the drawer's clear inside width, depth and height, including any obstruction above it. A 30-inch cabinet doesn't provide a 30-inch-wide drawer interior.
Give each item a little finger room. A beautiful fitted insert becomes irritating if you can't pick up the scale or lift a basket. Removable compartments are easier to rearrange when your equipment changes, and you can lift them out to remove stray grounds.
Open a compartment to see what belongs there
1Scale
Give the scale a flat space of its own. Don't pile tools on its weighing platform. Check that it can pass through the drawer opening without catching.
2Portafilter & tamper
Use a long compartment for a clean spare portafilter. Lay a tall tamper on its side if necessary. Check handle length and the drawer's closing clearance.
3Baskets & small parts
Keep spare baskets, a compatible dosing ring and other small dry parts in a removable tray. Don't buy a 58 mm accessory for a 54 mm machine.
4Filters
Use a clean, dry covered compartment sized for your actual filters. AeroPress discs and folded pour-over papers need different spaces.
5Spoons & brush
Put the items you reach for often near the front. Keep a dry grounds brush here; give the wet cleaning cloth somewhere else to dry.
6Room to change
Leave one small flexible compartment. It can hold tomorrow's useful tool without turning the entire drawer into an expensive custom puzzle.
For a manual brewing station, replace the portafilter compartment with space for your scoop, stirrer and brewer parts. The point is to organize your routine, not copy someone else's espresso drawer.
Middle drawer: cups and coffee
Choose the drawer depth using the tallest cup or canister you intend to store. Keep everyday mugs in a single accessible layer, with their handles easy to grasp. Use dividers or a suitable liner to stop them knocking together; check the drawer's load limit before filling it with ceramics.
Store beans sealed and away from heat and strong light. The National Coffee Association's storage advice favors airtight, opaque containers in a cool location. A clear jar in a sunny window is an attractive display, but a poor place for the beans you're saving for tomorrow.
Lower storage: reserves and maintenance
Use deeper storage for spare filters, the brewer you use occasionally and a small tray of maintenance supplies. Keep cleaning chemicals in their labeled containers, separate from food and cups and out of children's reach. Don't hide damp towels or a dirty knock box in the tool drawer. Empty, clean and dry them before putting them away.
A pull-out knock drawer can be useful in a busy espresso setup, but it needs its own space, an easy-to-remove waste container and a cleaning routine. It shouldn't share an enclosed compartment with clean filters and cups.
Build a complete coffee set—not a crowded display
Choose one main way to make coffee, then buy the pieces that support it. You don't need an espresso machine, drip brewer and every manual method permanently lined up together.
The espresso corner
The working set: espresso machine, a suitable grinder if one isn't built in, compatible portafilter and tamper, a scale that fits your workflow, milk pitcher if you make milk drinks, a small tamp mat, cups and an easy-to-empty knock box.
The storage set: sealed beans, spare baskets and filters, dry cloths and the machine's specified cleaning supplies. Check what comes in the box before buying duplicates.
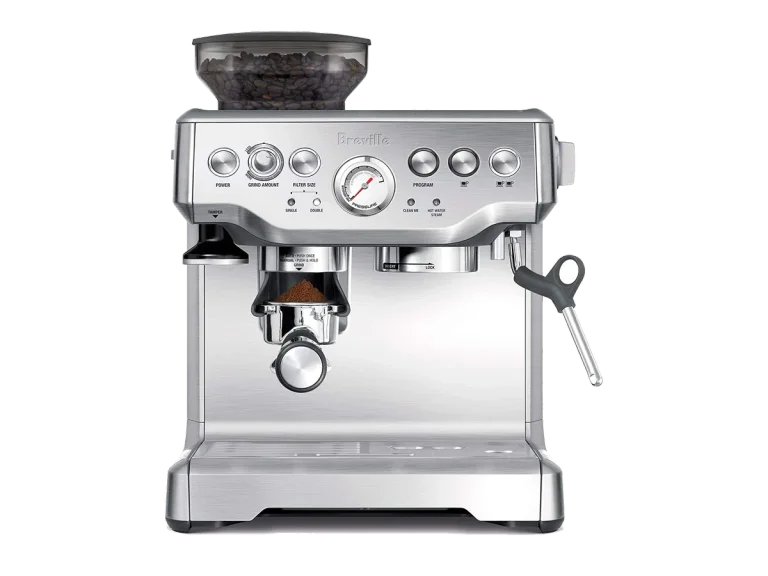
Breville Barista Express BES870XL
A practical example for a dedicated espresso corner: its integrated grinder reduces the number of appliances on the counter. Breville includes a 54 mm portafilter, baskets, tamper and milk jug, so those don't need to become a second shopping list. It still asks you to grind, tamp and steam manually.
Choose it if you want that hands-on routine and have room to refill the tank, remove the drip tray and use the steam wand. If serving several milk drinks quickly is your priority, compare the workflow before choosing: our Barista Express review goes into the trade-offs.
Coffee Corner may earn a commission from qualifying purchases through shopping links, at no extra cost to you.
The compact manual corner
The working set: one brewer, a kettle, a sturdy mug or server, the correct filters and a scoop or scale. Add a suitable grinder when you want to grind whole beans at home. Keep the kit small enough to lift out of the way for cleaning.
The storage set: a covered filter box, sealed coffee and a dry compartment for the brewer. You don't need espresso tampers, puck screens or a knock drawer for this setup.
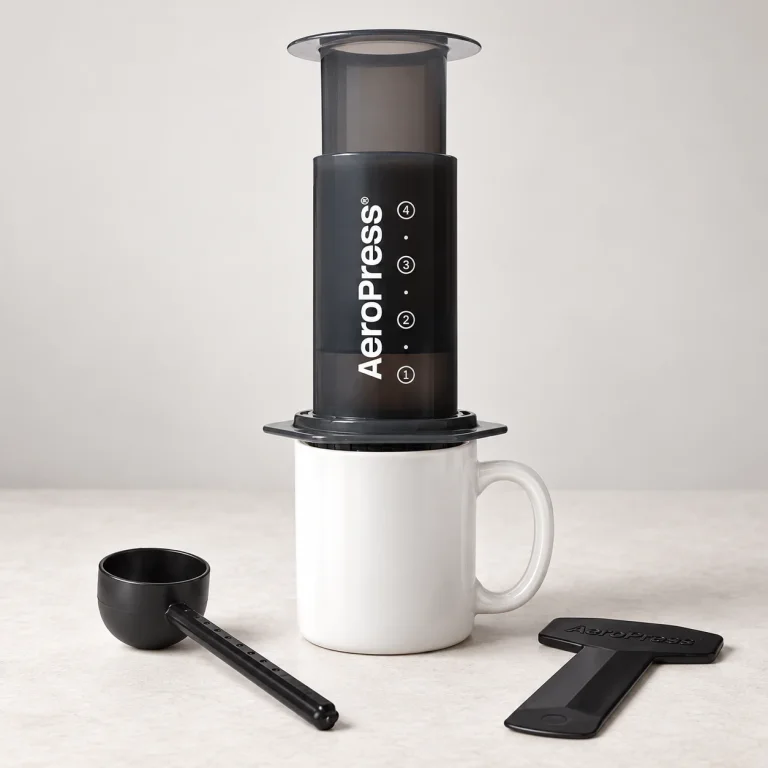 AI
AIAeroPress Original, Gray / Standard
This is a useful compact option for someone making one cup at a time. It needs hot water and a suitable mug, but no powered brewer occupying the cabinet. The Original uses standard AeroPress filters; XL filters and capacity belong to a different model.
Press upright onto a sturdy mug on a stable surface. After cleaning, AeroPress recommends storing the seal free of compression. Allow the parts to dry before returning them to the drawer. Our AeroPress guide covers the recipe and compatible gear.
These Amazon totals are global ratings, not counts of US written reviews. The listings pool versions or finishes; select the exact model shown. The two brewers serve different routines rather than competing for one universal “best” label.
Size the station with the equipment in use
For a generous built-in example, two 30-inch base units give you a 60-inch cabinet run before end panels or other finishing details. One bank can hold tools and cups; the other can hold beans, spare equipment and maintenance supplies. That is a planning example, not a minimum size or a guarantee that any appliance will fit.
Mark the proposed top on your existing counter with removable tape. Put the machine or cardboard templates in place, then add the things you hold during preparation. Include the portafilter handle, opened tank lid, swung-out steam wand and the route the drip tray takes when you remove it.
Stand at the proposed height and imitate the routine. Can you read the controls, fill the tank and work without reaching awkwardly? Check drawer extension into the walkway too. A cabinet that fits between two walls can still block the room when its drawer is open.
If space is tight, reduce the equipment before reducing the working area. A smaller, complete station is more pleasant than a large machine squeezed onto a surface with nowhere to put a cup.
Make it look considered, not staged
 AI
AIWarm walnut and pale stone: use the wood as the main feature, a quiet backsplash and restrained metal handles. Let the machine and a few ceramic cups provide the detail.
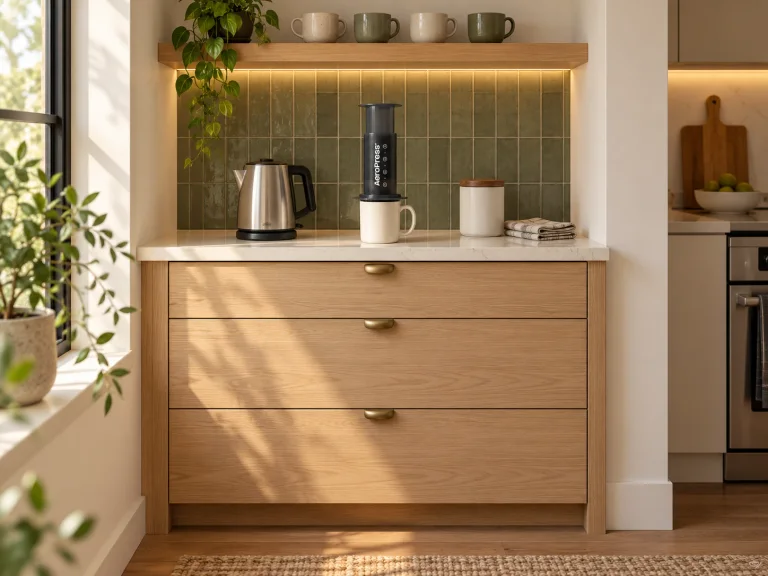
Light oak and muted green: a good direction for a smaller kitchen. A little color behind the station gives it an identity without adding objects to the worktop.
Painted cabinetry that matches the kitchen: useful when you want the coffee corner to feel built in rather than added later. Carry the same handle finish through, then distinguish the station with a shelf and task light.
Choose one wood tone, one main metal finish and a small family of cup colors. Put lighting where it illuminates the preparation surface rather than shining into your eyes. Mount shelving only after checking the brewer's opening and refilling access. A high shelf with a few useful cups is better than a low one that makes the machine awkward to maintain.
Get the worktop, water and power right
Choose a worktop with care instructions you can live with. Ask how its finish handles coffee, water, heat and the cleaning products you use. Protect vulnerable surfaces as the worktop maker directs, wipe spills promptly and keep standing water away from joints and exposed edges.
The Barista Express manual calls for a level, clean surface away from the edge and hot cooking appliances. Leave practical access around the machine rather than treating its closed dimensions as the whole footprint. Put the milk pitcher where it can move freely under the wand, not against a side wall.
Plan a short, clear route to the sink for filling and emptying. A rinse jug can reduce trips, but it doesn't replace washing parts properly. Keep milk refrigerated until needed; a beautiful lower cupboard isn't cold storage.
Use an appropriately located outlet and follow the appliance's electrical instructions. Route cords away from drawer runners, water and hot surfaces. Have a qualified electrician assess new outlets or the planned electrical load. A cabinet's built-in power strip doesn't establish that it can safely run your espresso machine and kettle together.
For a concealed coffee cupboard, design around open-door operation and the appliance's ventilation requirements. Don't assume pocket doors or a sliding shelf make it safe to run hot equipment inside a closed cabinet.
What to ask before spending money
Put the first money into stable support, working space and good drawers. Spend next on a suitable brewer and grinder. Decorative lighting, custom inserts and display shelves can follow. A cheaper cabinet stops being good value if you have to replace it to gain the depth or access the first one lacked.
When comparing ready-made furniture, read both the star average and the amount of relevant owner feedback. Look especially for drawer travel, damaged panels, alignment and long-term use. A high score from a pooled listing doesn't tell you whether the exact width and finish you selected suit a coffee station.
Fix a coffee corner that feels frustrating
- The counter always looks crowded
- Check whether the problem is spare equipment or a missing work area. Move the brewer you don't use daily into lower storage, then reserve a clear preparation space for the next morning. If you still have nowhere to set down the pitcher, the furniture layout needs more work.
- The drawer won't close cleanly
- Remove the contents and try it empty. If it closes, check the tallest tool and divider height before adjusting the hardware. If it catches empty, follow the cabinet's runner-alignment instructions rather than forcing it.
- Refilling means dragging the machine forward
- Watch which lid, tank or hopper hits the shelf. Reposition that obstruction and check the complete removal movement before fixing the new shelf position. Don't solve a clearance problem by leaving the appliance near the front edge.
- The station moves when you prepare coffee
- Stop using it until the cause is resolved. Check leveling, assembly and the specified wall fixing. A decorative mat won't repair a loose cabinet, overloaded top or inadequate support.
Coffee bar cabinet questions
Do I need a dedicated coffee bar cabinet?
No. A suitable section of your existing kitchen counter with a well-organized drawer may be the better solution. Buy separate furniture when it gives you working space or storage you genuinely lack.
Should the drawer have a custom foam insert?
Only if it solves a specific storage problem. Start with removable, easy-to-clean compartments and leave room for your fingers. A fitted layout is less useful if changing one tool means replacing the whole insert.
Is a pull-out shelf a good place to brew?
Only when the shelf, runners, locking arrangement, cabinet and appliance instructions support that use. A slide-out tray advertised for access isn't automatically a safe brewing platform. A fixed worktop is the simpler starting point.
What makes the corner feel special?
The details you notice every day: a drawer that opens fully, a cup within easy reach, light on the work surface, no cable caught behind a runner and enough room to finish a drink. Choose the materials you enjoy, then make the inside work as well as the outside looks.