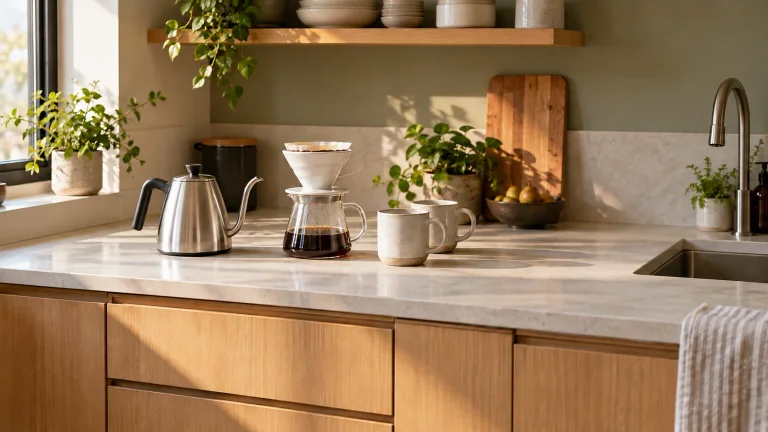
A good coffee corner puts the things you use every morning within easy reach and leaves enough room to make the drink. Start with your existing counter and brewer. Give dry supplies a home, keep a clear working area beside the equipment, and plan where the wet parts go afterward. A new cabinet can help, but it isn't the first thing to buy.
These coffee station ideas cover a small kitchen, a shared household and a more involved espresso setup. For recipes and equipment advice to go with your space, explore Coffee Corner, or use our brewing methods guide to choose a routine that suits your mornings.
Start with one ordinary morning
Before moving furniture, make your usual coffee and notice what you reach for. Where do you fill the kettle? Where does the filter go when it's wet? Do you have to move three jars to find the scale? Those small interruptions tell you more than a photograph of somebody else's setup.
Lay out only the daily essentials: your brewer, coffee, water, a cup and whatever measuring tools your recipe uses. Add milk equipment if you actually make milk drinks. Put occasional items elsewhere for now. A station that holds every coffee accessory you own can leave nowhere to use any of them.
Try the arrangement for a few mornings before buying organizers. If you keep reaching across hot equipment for a mug, move the mugs. If the kettle blocks food preparation, make the dry kit easy to put away.
Measure the working space, not just the machine
A machine can fit on a worktop and still be awkward to fill or clean. Measure it closed, then repeat the check with the parts you open or remove. There's no universal clearance that works for every brewer; use its manual and the actual movement of its parts.
Before you commit to a position
- Worktop: measure usable width and depth, excluding trim and any area needed for plugs behind the machine.
- Top access: open the lid or hopper. Check that you can reach it comfortably without lifting a full appliance.
- Water tank: follow its removal path. A rear tank may need space above as well as behind.
- Front and side access: remove the drip tray, swing the steam wand and move the portafilter as you would during use.
- Standing room: open nearby drawers and doors. Check that another person can pass without brushing against hot equipment.
- Power and cleanup: check the cord route, suitable outlet and path to the sink before choosing furniture.
For example, the Breville Barista Express manual shows a rear tank lifted by its handle, a removable front drip tray and a swiveling steam wand. Those are three different access needs. It also calls for a clean, level, dry surface away from the counter edge and hot burners. Follow your own model's placement instructions rather than copying the pictured arrangement blindly.
Five coffee corner layouts that solve different problems
1. The existing-counter coffee corner
Keep the brewer on a suitable dry section of counter with a clear patch beside it. Put coffee and filters near the preparation side, cups near the serving side, and cleanup within a convenient walk. Reverse the order if it feels more natural in your kitchen.
This is the easiest place to start because you can rearrange it without buying furniture. Use a nearby drawer for spare filters, measuring tools and cleaning supplies. Leave the area directly around the brewer open; a tray of decorative objects is less useful than room to set down a wet filter basket.
If upper cabinets block the lid or tank, choose another position. Don't make dragging a hot, full appliance toward the counter edge part of the daily routine.
2. A small manual-brewing kit on a tray
 AI
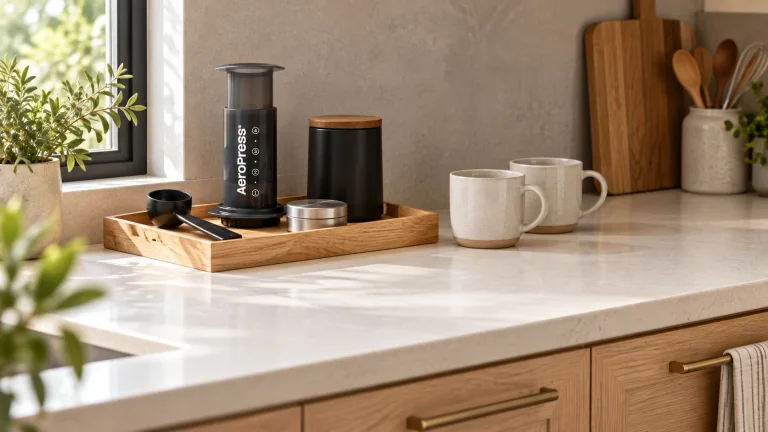
AIFor a rental or a small kitchen, group the dry brewing kit on a shallow tray that fits an existing shelf. An AeroPress, filters and scoop can come out together, while the kettle stays in its normal safe position. You gain an organized routine without permanently giving up a whole counter.
The tray is an organizer, not a pressing platform. Set an AeroPress upright on a sturdy mug on a stable counter, clear of the edge, before adding hot water. Our AeroPress guide covers the recipe and setup. After washing and drying, store the brewer with its seal pushed completely through the chamber, following AeroPress's storage instructions.
Keep only the cups you regularly use beside the kit. A row of spare mugs can occupy more space than the brewer itself.
3. A fixed cabinet outside the main preparation area
A sideboard or cabinet makes sense when coffee competes with chopping and cooking space. Start by checking its usable top, stated load limits, surface-care instructions and required assembly or anchoring. A furniture photo with an espresso machine on top doesn't establish that your heavier setup is suitable.
When a separate piece of furniture is the right solution, compare these coffee bar cabinets and drawer layouts for a complete station, including working space, storage and installation before ordering.
Keep daily supplies in the upper drawer and reserve bags or occasional cups below. Test the cleanup journey with empty, cool equipment before committing: remove the drip tray, walk to the sink and return. If doors or chairs make that awkward, change the location.
Choose a fixed, stable work surface for brewing. A rolling cart can carry dry supplies, but don't assume that locked wheels make it suitable for pressing, tamping or supporting a hot appliance. This layout is about freeing kitchen space, not adding another obstacle to it.
4. A shared station with a separate serving end
When two people use the station, keep mugs, spoons and sugar accessible without reaching over the person brewing. Put finished drinks at the serving end rather than in front of the grinder. That lets someone collect a cup while the next drink is being made.
Label regular and decaf coffee clearly if you keep both. Store milk in the refrigerator and bring it out when needed; a decorative bottle on the counter isn't a storage solution. Give each brewer a defined spot if your household uses different methods, but share the scale or kettle when that works.
For several black coffees every morning, a batch brewer may fit the routine better than repeatedly making individual servings. Compare the relevant options in our coffee maker buying guide before filling the station with more equipment.
5. An espresso workspace with room for the whole drink
 AI
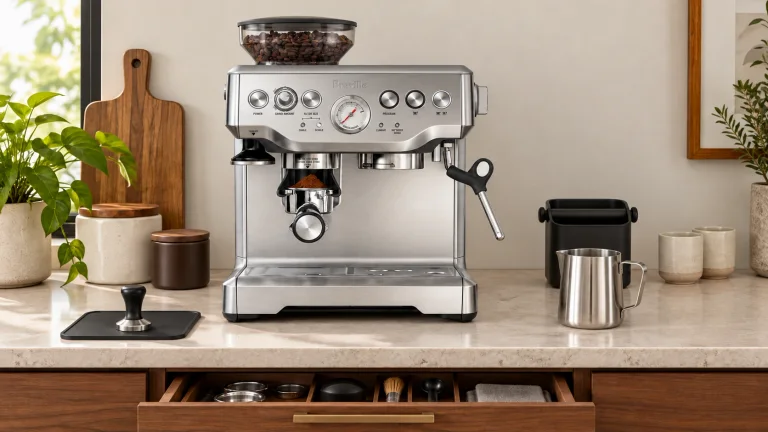
AIPlan this station around the portafilter and milk pitcher as well as the machine. Keep a suitable tamping area near the grinder, leave room to use the steam wand, and put the knock box where you can reach it without crossing the hot wand. Store spare baskets and cleaning tools in a drawer rather than spreading them across the working area.
Make a second-drink walkthrough with the machine cool: return the pitcher, empty the basket, prepare another dose and pick up the next cup. That exposes cramped spots a front-facing photo can hide. If you're learning milk drinks, our cappuccino guide explains the brewing and milk steps.
Keep cords away from hot surfaces, water and counter edges, following the appliance manual. Don't improvise a power-strip arrangement to make an unsuitable location work. If the available outlet or circuit is uncertain, have a qualified electrician assess it before installing the station.
Store the dry things dry, then make cleanup easy
Keep coffee sealed, cool and away from direct light and heat. A sunny shelf above the station may look attractive, but it isn't a good place for the daily bean supply. OXO's storage guidance recommends a cool, dark location and protection from air and moisture. Our coffee storage guide goes into the options.
Put paper filters in a clean, dry container or drawer. Leave washed parts out to dry before returning them to enclosed storage. Give damp cloths a separate place; they shouldn't share a drawer with filters or sit underneath an electrical appliance.
For a station without a sink, keep a washable container available to carry cooled removable parts to the kitchen. Empty a drip tray before it's awkwardly full, and wash milk equipment promptly according to its instructions. A nearby bin helps with used grounds, but it doesn't replace rinsing and cleaning.
Finish by wiping up spills, returning clean tools and checking tomorrow's coffee and filters. A clear counter makes it obvious when something needs attention.
Useful gear for a compact coffee corner
These three items suit the manual-brewing layout above. Buy the missing tool that solves a problem in your routine; there's no need to replace a working brewer or add a grinder if you're happy starting with ground coffee.
Coffee Corner may earn a commission from purchases through these links, at no extra cost to you. Affiliate disclosure.
 AI
AIA brewer you can put away
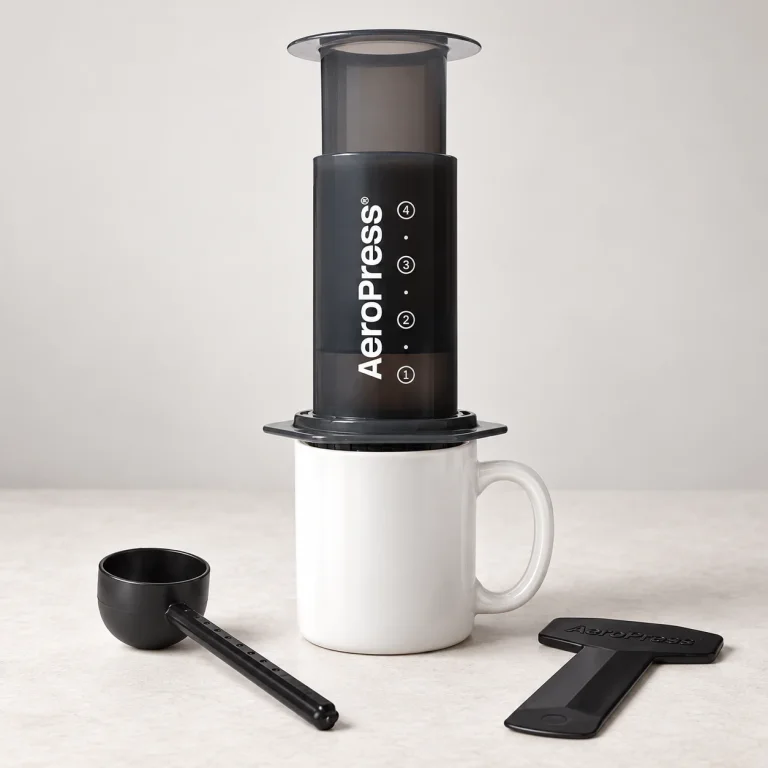
AeroPress Original
The gray Original in the standard size suits a small station because the brewer and its supplied scoop and stirrer can be stored together. It's a hands-on option for a single serving, especially useful when you don't want a permanent appliance on the counter. The Original's nominal capacity is 10 oz; that isn't a measured finished-cup yield.
Choose a batch brewer instead if your main task is serving several people. The mug pictured isn't included with the standard Original. Follow the upright recipe linked above rather than treating it as a pump espresso machine.
 AI
AIFor a station with room for whole beans
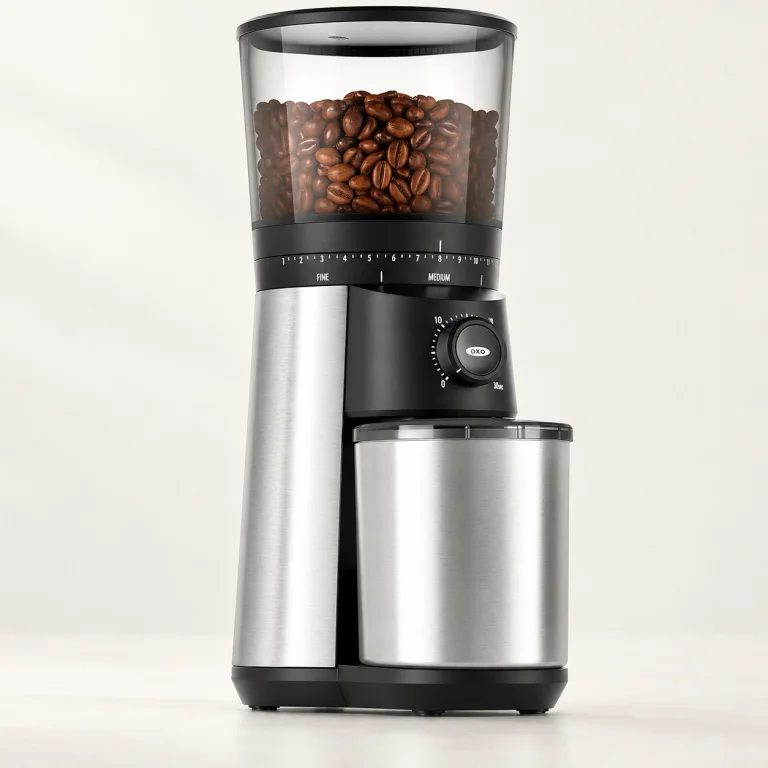
OXO Brew Conical Burr Grinder
The OXO adds electric grinding and an accessible adjustment ring to a manual-brewing station. Make room to lift its hopper lid and remove the grounds cup before buying. Its front dial controls time, not dose weight, so a scale remains useful for repeating a gram-based recipe.
Keep it on a dry, level surface. OXO's manual warns that oily beans can clog the chute; unplug before cleaning and don't wash the burrs. For a different brewing task, compare our coffee grinder guide rather than assuming this is the right partner for every espresso machine.
 AI
AIA small tool for repeating your recipe
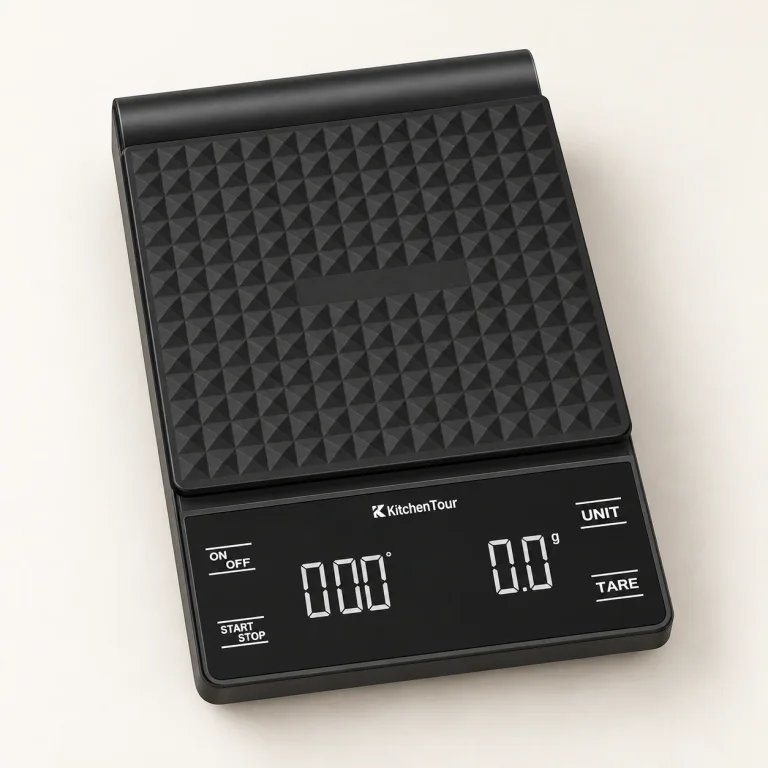
KitchenTour EK6002 Coffee Scale
A scale with a timer gives the manual station one place to measure coffee and track a steep. This KitchenTour is a straightforward option for that task, with a removable silicone mat and separate weight and timer displays. Let the reading settle on a dry, level surface.
Keep it away from the sink splash zone and put it away dry. With an AeroPress, weigh your ingredients first, then move the brewer and mug to a stable counter before pressing. The scale isn't a support for downward pressure.
Fix the awkward part before adding more storage
The counter looks tidy, but brewing feels cramped
Check whether the problem is storage or working space. Remove the decorative items and spare cups for the next brew, leaving a clear preparation area. If the routine becomes easier, keep that area empty and move the extras into closed storage. Another organizer on the same counter would take back the space you've just gained.
You keep moving the machine to refill it
Open the tank or lid with the machine cool and unplugged. If cabinetry blocks its normal removal path, relocate the machine to a suitable surface with access. Check the next refill before settling on the layout. Don't compensate by tugging on cords or lifting a hot, full appliance.
The scale reading drifts while you're measuring
First distinguish a measurement problem from a recipe problem. Move the scale off a flexible tray or uneven mat onto a dry, level counter, check the batteries and repeat the reading with the same empty cup. If it remains unstable, resolve the scale fault before changing the coffee dose.
The station is always wet after a milk drink
Check whether wet tools lack a return route. Make one designated spot for the used pitcher and removable parts, then take them for cleaning after the drink. If spills come from an overfull drip tray, empty it earlier. Persistent leaks from an appliance need the maker's troubleshooting or service, not a larger decorative mat.
Coffee corner questions
Can I make a coffee station without a sink?
Yes, if refilling and cleanup are convenient enough for your routine. A manual black-coffee setup usually involves fewer milk tools than an espresso station. Walk through the actual trips before buying a cabinet; the best-looking location may be inconvenient in daily use.
What should I buy first?
Use your existing brewer, kettle and cup first. Add a simple organizer only after you know what needs grouping. If inconsistent dosing is the problem, consider a scale; if you want to adjust grind, consider a grinder. Leave decorative upgrades until the workflow is comfortable.
Do I need a scale to start?
No. Use your brewer's own scoop and fill-mark instructions where provided. For the AeroPress Original, our linked recipe includes the manufacturer's approximate scoop method. A scale helps you repeat and compare recipes, but a useful coffee corner can start without one.
How can a rental kitchen look more intentional?
Choose a small, consistent group of cups and containers, use an existing drawer, and keep the preparation area clear. A removable dry-kit tray can bring the arrangement together without drilling. Avoid mounting shelves or altering electrical fittings without the permissions and professional help the work requires.