To use a moka pot, fill the lower chamber to its specified water level, loosely fill the coffee funnel, assemble the pot and brew over controlled heat. Remove it when brewing finishes, then let it cool completely before opening. You do not need a scale or an espresso tamper.
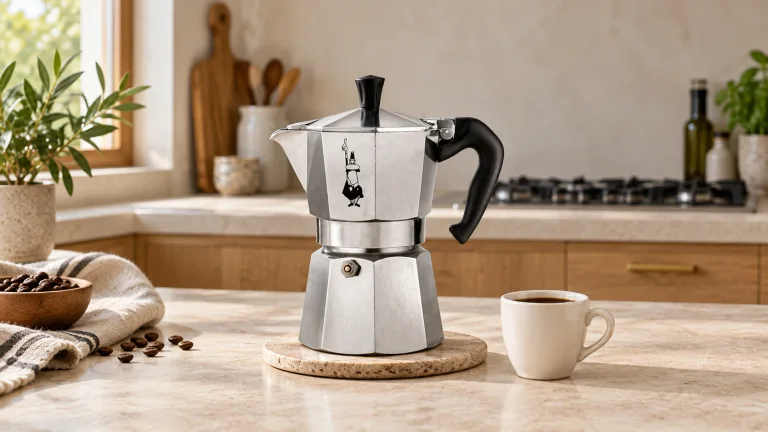
The method below uses the classic aluminum Bialetti Moka Express. Its fill line, coffee basket and safety valve matter more than a universal coffee-to-water ratio. Brikka, induction models and other makers can have different instructions; identify your pot before transferring a recipe.
The moka-pot method, step by step
You need an intact Moka Express, drinking water, coffee ground for moka brewing, a suitable stove, a spoon and a heatproof resting place. Keep milk and sugar out of the pot; add them to the finished drink.
- Fill the cold base. Add cold water up to the lower edge of the safety valve, leaving the valve uncovered. Insert the funnel.
- Add the coffee. Loosely fill the funnel and level the surface without pressing. Brush stray grounds off the boiler rim and threads.
- Assemble. Check that the gasket and filter plate are seated under the upper chamber. Screw the halves together firmly, without using the handle as a lever. Close the lid.
- Heat gently. On gas, keep the flame beneath the base. On an electric or ceramic hob, use a moderate setting rather than maximum power. Stay beside the stove.
- Finish promptly. Remove the pot from the heat when the upper chamber has filled; the familiar end-of-brew gurgle is a cue to stop, not to keep cooking the coffee. Use the handle and set the pot on a heatproof surface.
- Stir and serve. Gently mix the coffee in the upper chamber before dividing it between cups. Allow the drink to cool enough to sip, and the pot to cool completely before unscrewing it.
These steps follow the Moka Express manual and Bialetti's brewing guidance. A timer can help you learn your stove, but it should not override a leaking pot, a venting valve or a brew that has already finished.
Know the parts before the first brew
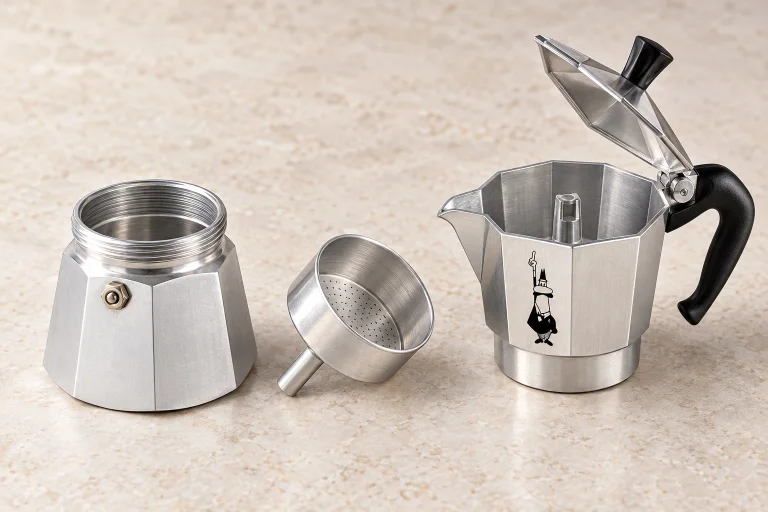
The lower boiler holds water. The funnel holds coffee, with a narrow stem extending into the boiler. The upper collector receives the brewed coffee through its central chimney. Underneath the collector, a filter plate and gasket complete the assembly.
Before heating, look for a sound gasket, an undamaged funnel rim and clear filter holes. The parts should fit together normally. If a new pot has loose components, damaged threads or debris that washing does not remove, contact the seller instead of trying to repair a pressure-bearing part yourself.
For a new Moka Express, Bialetti specifies an initial water-only cycle followed by at least three coffee brews that you discard. Let the pot cool between cycles. This is initial preparation, not a reason to leave old coffee residue in the pot afterward.
The valve on the boiler is a safety component, not a steam wand. Keep it facing away from you. Never cover it, adjust it while the pot is hot, or keep heating a pot that is venting there.
Size, water and coffee: use the pot's own measures
A “six-cup” moka pot is not a six-mug coffee maker. The number refers to small espresso-style servings. It also does not tell you that the pot contains six US fluid ounces, or that its water capacity equals the finished coffee yield.
Choose a size around the amount of concentrated coffee you normally share. If you want a long drink, add water or milk after brewing. For regularly smaller batches, a smaller pot is more straightforward than improvising a half-filled basket in a large one.
| What you are measuring | Useful rule for the Moka Express |
|---|---|
| Water input | Use the lower edge of the safety valve and your model's manual, not the capacity of your serving mug. |
| Coffee input | Fill the correct funnel loosely. Different coffees and grinds will not all weigh the same in that basket. |
| Finished coffee | Do not assume every milliliter of input water reaches the cup or keep heating to force that result. |
| Drink size | Divide the finished batch, then dilute each portion to preference. |
No scale? The valve level and full, uncompressed funnel are your measures. Use a spoon to transfer grounds rather than counting spoonfuls. A fixed tablespoon conversion would be less dependable than the basket you already have.
If you do own a scale, recording how much your correctly filled basket holds can help repeat a successful brew with the same coffee. It does not replace the water-level limit or justify squeezing extra grounds into the funnel.
Choose the grind and fill without tamping
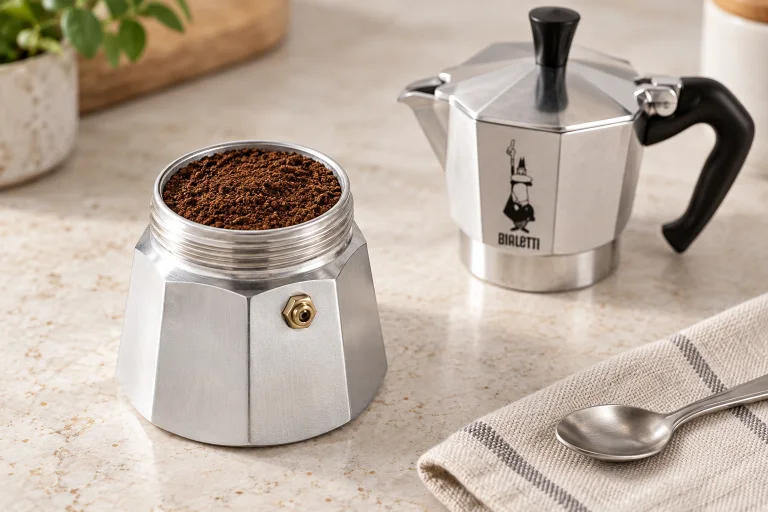
Start with coffee labeled for moka or stovetop brewing. When grinding beans yourself, aim for a medium-fine setting, generally coarser than espresso. Lavazza's grind guidance explains the trade-off: overly coarse grounds can give weak coffee, while excessively fine grounds can impede flow and produce harshness.
There is no transferable grinder number. A setting of 12 on one grinder tells you little about another. Keep a note of the coffee and setting that work in your pot, then make a small adjustment when needed.
Fill the basket evenly, gently sweep the top level and stop. Do not tamp, compress a mound with the upper chamber, or pack the grounds down to make room for more. A moka funnel is not an espresso basket. Check the sealing edge again before screwing the pot together.
Match the stove and control the heat
The classic aluminum Moka Express works on gas, electric and ceramic heat. It does not work directly on induction. An induction-capable moka model is a separate choice; confirm the exact size and your hob's minimum pan requirements before buying. Our stainless-steel coffee-maker guide covers equipment choices.
On gas, select a burner that supports the pot securely and lets the flame stay inside the base. A flame wrapping around the sides wastes heat and exposes the handle to it. On a hotplate, moving the finished pot to its heatproof resting place matters because switching off the element does not instantly cool it.
Start with cold water for this Moka Express method. You will encounter recipes that preheat the water, but that also makes assembly hotter to handle. You can learn the brewer without adding that step.
Keep the lid closed during brewing. Do not lean over the spout to watch the flow. If coffee spits out early, the seam leaks or the safety valve vents, turn off the heat and allow the pot to cool completely before inspection. Increasing the heat is not a remedy for a suspected blockage.
Troubleshooting: choose the matching next step
Separate a flavor problem from a mechanical fault. For leaks, unusual venting or failed brewing, stop heating first. Make the checks below only after the pot has cooled completely; persistent faults need the seller or manufacturer, not repeated trial brews.
No coffee reaches the top
Check: An incompatible induction hob may never heat an aluminum pot; a hot pot that fails to brew is a different problem.
Next step: Confirm stove compatibility. Once cold, check the assembly and filter passages against the manual. Do not increase heat to force flow through a suspected obstruction.
Water or steam escapes at the threaded seam
Check: This is a sealing problem, not the normal sound from the upper chamber at the end.
Next step: Clean the rim and inspect the gasket. Replace a worn seal with the correct model and size; reassemble firmly. If leakage remains, stop using the pot and seek service.
The safety valve vents
Check: Steam from the boiler's valve is different from the final gurgle inside the collector.
Next step: After cooling, check for excess water, tamped coffee or an unsuitable fine grind. Correct the identified setup error; recurring venting means stop using the pot and contact the maker.
Coffee spits or rushes out early
Check: Early forceful brewing differs from a brief gurgle as a normal brew finishes.
Next step: After cooling and checking the assembly, try a lower heat setting for the next brew. Look for a calmer brew without leakage or valve venting; stop if the fault persists.
A normally flowing brew tastes harsh
Check: First check whether it stayed on the heat after finishing.
Next step: Remove the next batch promptly. If you already do that, compare a slightly coarser moka grind. Look for less harshness without turning the coffee watery.
The cup is weak or thin
Check: Check whether the basket was only partly filled or the grounds were unusually coarse.
Next step: Restore a full, loose basket first. If already correct, try a slightly finer moka setting, never powder-fine espresso grind. Look for fuller flavor with unobstructed brewing.
The mechanical checks come from Bialetti's manual; the grind comparisons follow Lavazza's guidance. A pleasant cup that is simply too intense needs a different solution: dilute a small portion in the cup before changing the brewing setup.
Clean, dry and check the seal
After the pot has cooled, separate the chambers, remove the grounds and rinse the Moka Express with warm water. Bialetti specifies hand washing without detergent or abrasive pads; do not put this aluminum pot in the dishwasher.
Clear the filter holes gently, and avoid knocking the funnel against a bin to empty it: bending its rim can compromise the fit. Dry every part before storing the pot apart. A dark interior is not a reason to keep an oily buildup or damp grounds.
Inspect the gasket for wear and replace it when needed; Bialetti also recommends annual replacement. Order by model and size, rather than assuming all rings marked “six cup” are interchangeable. Use the manual's illustrated valve inspection and descaling instructions for this model, and let the pot cool before either job.
Serve it short, longer or with milk
Moka coffee is concentrated stovetop coffee, not machine espresso. Start with a small serving. For a longer black drink, add hot drinking water in small increments until the strength suits you; that changes concentration without changing the pot's fill.
For milk drinks, heat or froth milk separately and combine it in the cup. Follow our cappuccino guide for milk texture, or make Cuban coffee with whipped sugar foam. Neither preparation requires putting milk or sugar in the boiler.
Useful gear for your moka-pot setup
Start with the upgrade that solves a problem you actually have. A grinder gives you control over whole beans, a frother adds a foamy milk topping, and a scale helps you repeat a dose you like. If moka-ground coffee and your current setup already work well, you do not need all three.
Coffee Corner may earn a commission if you buy through these links, at no extra cost to you. Affiliate disclosure.
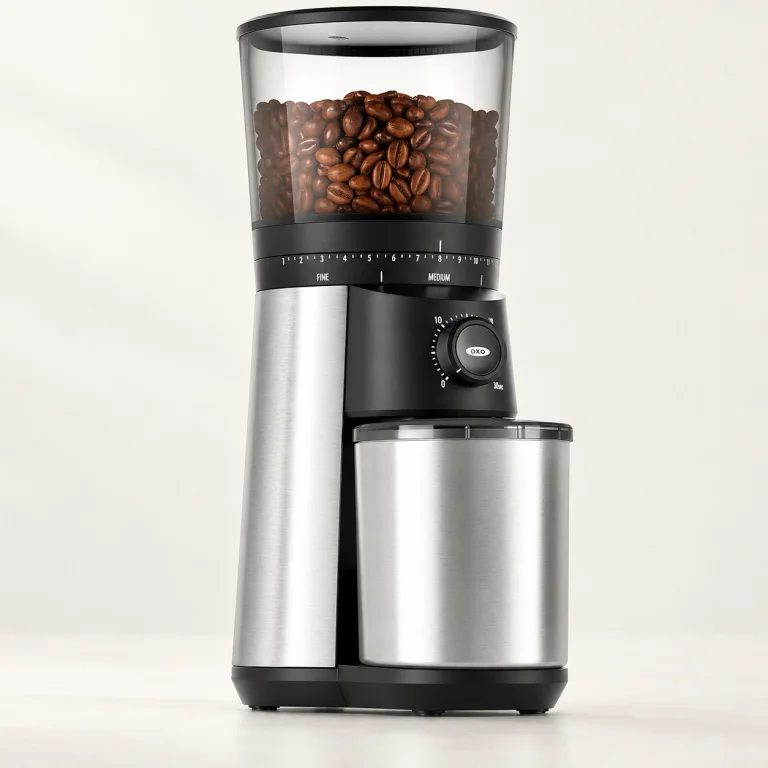
For freshly ground beans
OXO Brew Conical Burr Grinder
This electric grinder is a practical choice when you want to adjust the grind without hand-cranking every batch. Its numbered adjustment ring makes it easy to return to a setting, and the removable grounds cup lets you fill the moka basket away from the grinder.
Aim for the moka grind described above, rather than automatically choosing its finest setting. The front dial controls grinding time, not a measured coffee dose. OXO's manual also warns that oily, dark-roasted beans can clog the chute: unplug before clearing it with a small flexible brush, and keep water away from the burrs.
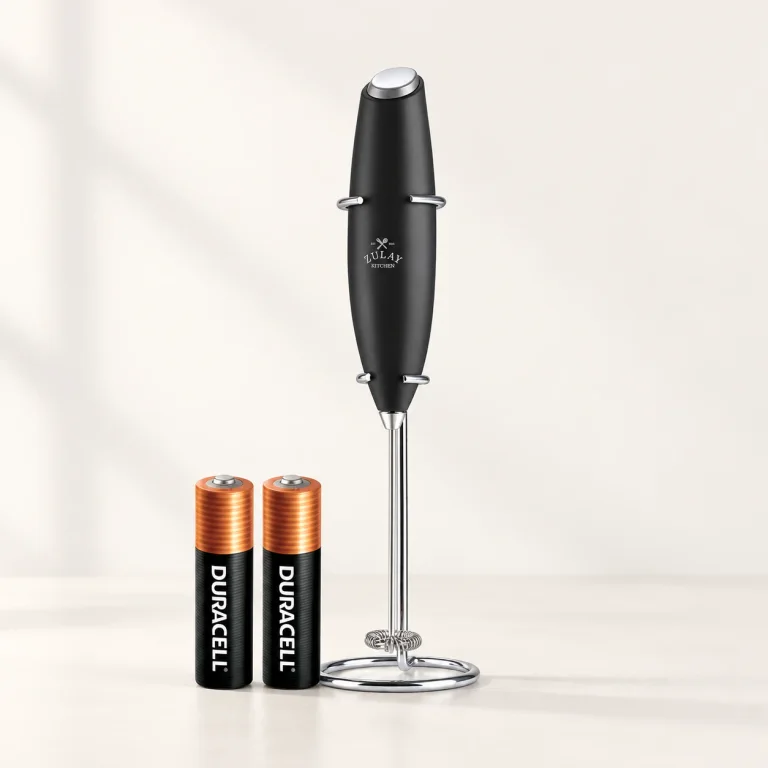
For a foamy milk topping
Zulay Kitchen Milk Boss
A small handheld whisk makes sense if you enjoy moka coffee with milk but do not want another countertop appliance. The selected Alpha Black Z1 version includes a stand and two AA batteries. It froths; it does not heat milk or produce steam.
Warm the milk separately if you want a hot drink. Use a roomy vessel, put the whisk below the surface before switching it on, and stop it before lifting it out. Rinse the whisk promptly and keep the handle dry, as Zulay's care instructions advise. The slender shaft needs gentle handling.
For keeping track of your dose
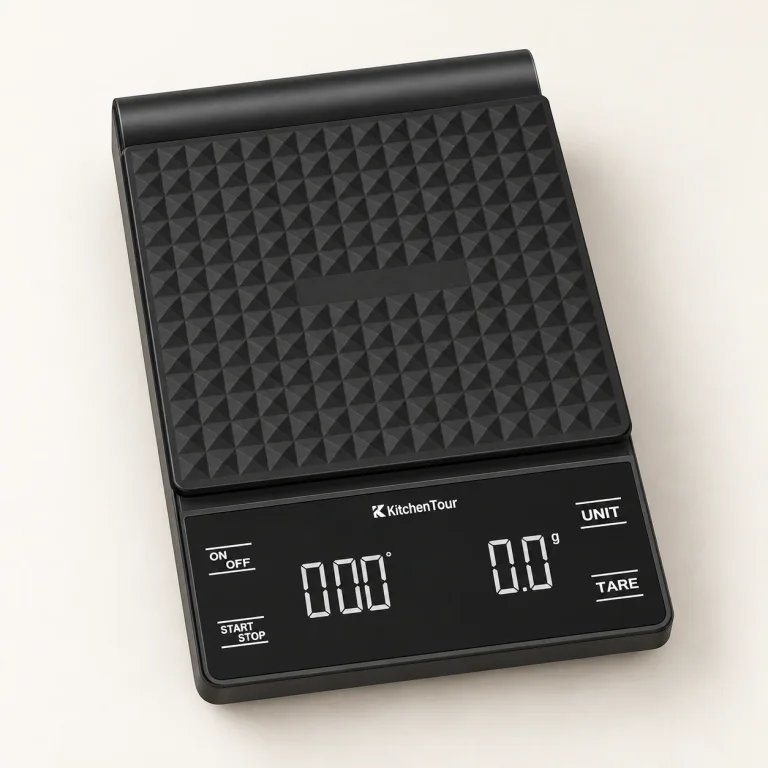
KitchenTour EK6002 Coffee Scale
This simple scale has a tare button, readable display and removable silicone mat. It is useful for recording how much coffee your basket holds with a particular bean and grind. Fill the cold basket normally, tip those grounds into a tared bowl to record the weight, then return them without tamping.
Keep using the pot's specified water level and full, loose basket; a scale does not turn this into an espresso-ratio recipe. Work on a dry, level counter, let the reading settle and keep the hot moka pot off the scale. The built-in timer is an extra convenience, not a reason to leave a finished brew on the heat.
Moka-pot FAQs
Can I use it without a scale or grinder?
Yes. Buy coffee ground for moka brewing, fill the water to your pot's specified level and fill the funnel loosely. Those physical measures work without weighing or counting scoops.
Can I make half a pot?
For this Moka Express method, keep the prescribed water level and full basket. Use a smaller pot for a routinely smaller batch. Only use a reducer or reduced-fill recipe when the instructions for that exact brewer allow it.
Should I wait until every drop of water comes through?
No. Remove the pot when brewing finishes rather than heating it dry to chase a yield. Let it cool completely before opening; leftover water is not an invitation to keep reheating the pot.
Does a bigger pot make weaker coffee?
The size label alone cannot tell you the strength. Fill the matching water chamber and basket correctly, use suitable grounds and assess the finished cup. Compare our brewing-method guide if you want a larger, lighter drink instead of concentrated moka coffee.