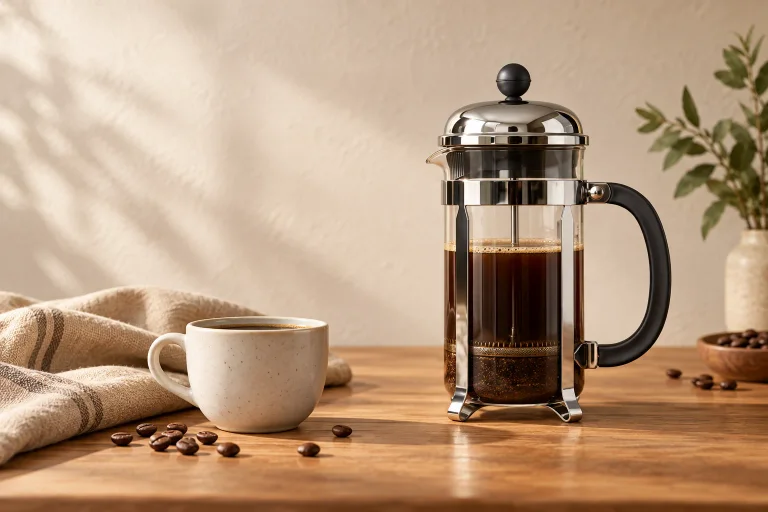
A useful French press coffee ratio is 1:15 by weight: 1 g of dry coffee for every 15 g of brewing water. For a manageable first batch, weigh 30 g coffee and 450 g water. Keep those quantities steady while you learn your grinder and press, then change one thing at a time.
Use the charts below to choose a batch for your press, follow the four-minute method, then adjust the next brew to taste. Without a scale, start with the tablespoon and scoop estimates.
The starting recipe: 30 g coffee and 450 g water
- Coffee: 30 g, freshly ground to the coarse setting recommended for your press.
- Water: 450 g hot drinking water, around 205°F / 96°C unless your press specifies otherwise.
- Ratio: 1:15, measured before brewing.
- Steep: approximately four minutes as a starting point, followed by a slow, gentle press.
- Vessel: a press large enough to hold the water, grounds and the headroom its instructions require.
- Serve: pour promptly after pressing; expect less finished drink than the water you added.
The rounded ratio and staged pour adapt Stumptown's recipe: 56 g coffee with 850 g water, approximately 1:15.2. Our 30 g / 450 g quantities are an adaptation, not its exact formula.
The National Coffee Association's method independently supports weighing, a coarse starting grind, roughly four minutes and gentle plunging. Its published ratio range also includes 1:15.
What 1:15 means, and how to calculate it
Always write the coffee amount first. At 1:15, 20 g coffee takes 300 g water; 40 g takes 600 g. Multiplying both ingredients by the same number changes the batch size while keeping the proportion unchanged.
To find the dose for a chosen water amount, divide the water weight by the ratio's second number. For 500 g water at 1:15, calculate 500 ÷ 15 = 33.3 g coffee. A scale that reads whole grams can use 33 g; the actual ratio is then about 1:15.15. Whole-gram rounding is sufficient for this recipe.
Work the other way if you have a fixed amount of beans: multiply coffee weight by the ratio number. The 24 g left in a bag makes a 360 g water recipe at 1:15. If the vessel cannot safely accommodate that batch, reduce both ingredients together or brew in a larger press.
A smaller second number means more coffee for the same water: 1:12 is a heavier dose than 1:15, while 1:17 is lighter. A lower ratio number makes a more concentrated starting recipe; grind and brewing time still affect the flavor. Use the brew ratio calculator for a quantity not shown below.
French press ratio chart
Each row starts with the water you intend to add. Coffee doses are rounded to the nearest gram. The chart is a calculation aid; it is not a set of manufacturer-approved maximum fill levels.
| Water | 1:12 | 1:15 | 1:17 |
|---|---|---|---|
| 250 g | 21 g | 17 g | 15 g |
| 350 g | 29 g | 23 g | 21 g |
| 450 g | 38 g | 30 g | 26 g |
| 500 g | 42 g | 33 g | 29 g |
| 750 g | 63 g | 50 g | 44 g |
| 900 g | 75 g | 60 g | 53 g |
For example, moving a 450 g water batch from 1:15 to 1:17 changes the coffee dose from 30 g to about 26 g. Keep the water, grind and timing the same for that comparison. Moving to 1:12 raises the dose to about 38 g; check that the extra grounds still leave adequate room.
If you add milk, count it separately. Brewing 30 g coffee with 450 g water and later adding 60 g milk does not make the brewing ratio 1:17. The brewing ratio remains 1:15; the serving has changed. Keep both numbers in your notes if milk is part of your everyday cup.
Keep ounces labeled too. Fluid ounces on a measuring jug describe volume; ounces on a scale describe weight. Do not divide a fluid-ounce water measurement by 15 and treat the answer as ounces of coffee. The easiest way to avoid the mismatch is to switch the scale to grams and use grams for both ingredients throughout the recipe.
French press tablespoons and scoops: brewing without a scale
For a rough version of the starting recipe, try 6 level US measuring tablespoons of ground coffee with 450 mL water. This assumes about 5 g per tablespoon. Use a measuring spoon, level it without packing the grounds, and keep that technique consistent.
Spoon estimates vary even in published recipes: Starbucks equates 2 tablespoons with 10 g, while OXO's general French press guide uses 8 g per tablespoon. That is roughly 5–8 g in those examples, not a guaranteed range for your coffee. Roast, grind and how you fill the spoon affect the actual dose.
| Water added | Weighed coffee at 1:15 | Approximate level tablespoons |
|---|---|---|
| 8 US fl oz (about 237 mL) | 16 g | 3 |
| 12 US fl oz (about 355 mL) | 24 g | 5 |
| 16 US fl oz (about 473 mL) | 32 g | 6½ |
| 450 mL starting recipe | 30 g | 6 |
| 800 mL batch for the 34 oz press example below | 53 g | 10½ |
The gram doses are rounded to whole grams; spoon counts are rounded to the nearest half tablespoon. The spoon method cannot guarantee a 1:15 ratio. Water amounts are measured before brewing and must fit your press with the required headroom; 34 oz on a press is its advertised capacity, not an instruction to add 34 oz water.
If your scoop is marked 2 tablespoons, 6 tablespoons means 3 level scoops. Check the marking: coffee scoops vary in capacity. Once you have a scale, weigh several of your usual level spoonfuls together and divide by the number of spoonfuls to learn your own average. Use the brew ratio calculator to find a gram dose for any other batch.
Choose a batch that fits your French press
Beware of the word “cup.” The Bodum manual lists an eight-cup beaker as 1 liter / 34 oz. Those are small coffee servings, not eight US measuring cups. Using NIST's approximate conversion, 34 US fluid ounces is about 1,005 mL; eight eight-fluid-ounce measuring cups would be about 1,893 mL. Neither number tells you the finished yield of a recipe.
A press's advertised capacity and your recipe water are different numbers. Grounds occupy space, and safe use requires headroom. A vessel labeled 1 liter should not automatically receive 1,000 g water plus coffee. Read its fill guidance before choosing the largest row in the chart.
For recipe planning, grams of water are approximately milliliters. Weighing both ingredients avoids confusion between vessel markings, measuring cups and mugs.
Starting doses by advertised press size
This planning table leaves roughly 20% of the nominal vessel volume for grounds and headroom. That is an allowance for estimating a batch, not a safe-fill rule or a manufacturer-approved recipe. Your press's fill line, required headroom and minimum brew size take priority; reduce the water if needed and divide the new water weight by 15.
| Advertised press size | Approximate nominal volume | Starting water | Coffee, rounded |
|---|---|---|---|
| 12 US fl oz | 350 mL | 280 g | 19 g |
| 17 US fl oz | 500 mL | 400 g | 27 g |
| 34 US fl oz | 1,000 mL | 800 g | 53 g |
| 51 US fl oz | 1,500 mL | 1,200 g | 80 g |
The milliliter capacities above are rounded: 12 US fl oz converts to about 355 mL, for example. Water is calculated from the rounded metric capacity × 0.8; coffee is water ÷ 15, rounded to the nearest gram. The water column is the amount added before brewing, not the finished drink yield. A 34 oz press can also brew the smaller 450 g / 30 g recipe, provided its instructions allow that fill level.
Plan around the actual mugs you use. If you want two 200 mL servings, 400 g brewing water will not provide a reliable 400 mL finished yield: some liquid stays with the grounds. Allow a margin without assuming a fixed retention amount. Measure the drink you pour once, then adjust the next batch proportionally within your press's limits.
Do not solve a short serving by pouring additional water into the spent grounds and treating that as the same recipe. You have introduced another brewing step. If the coffee in the mug is stronger than you want, adding a little hot water directly to the finished drink is a clearer adjustment.
For three people, decide whether you can brew one adequate batch safely. Use two smaller batches if one will exceed the fill limit.
How to brew the 30 g / 450 g batch
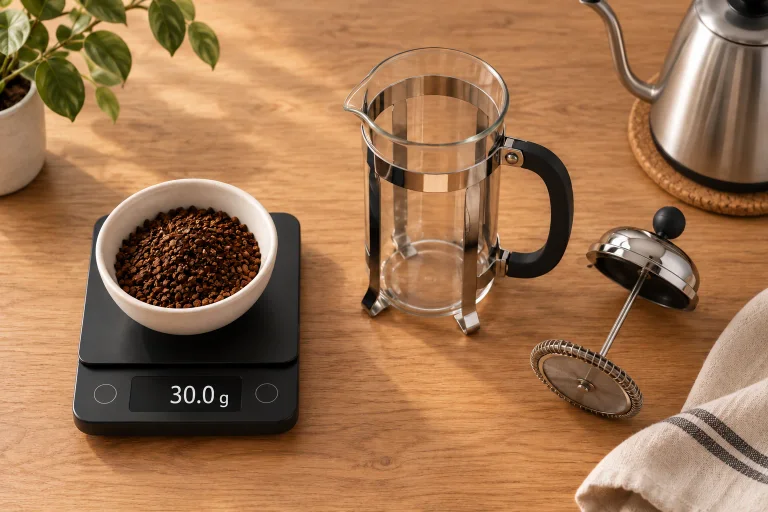
Set out a clean press, scale, timer, kettle, suitable stirring utensil and serving vessel. Read your press's assembly and fill instructions first. A kitchen scale that reads in grams is enough.
For timing and handling, the OXO general guide supports starting the four-minute timer at the first pour and pressing slowly. Manufacturer safety instructions take priority throughout.
- Check and prepare the press. Set it on a stable, heatproof surface. Inspect a glass beaker for damage. Preheat if the maker permits, then discard all rinse water.
- Weigh the coffee. Tare an empty bowl, weigh 30 g beans and grind. Add the grounds to the press. Place the press on the scale and tare again, so its next reading measures water alone.
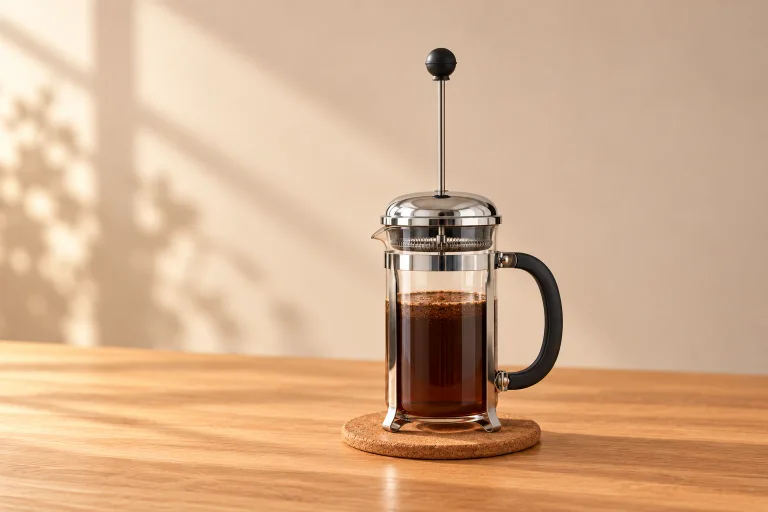
- Begin the brew. Start the timer with the first pour. Add about 225 g hot water and wet the grounds evenly.
- Complete the water at one minute. Stir gently to wet remaining dry pockets, then pour to 450 g total on the scale. That means approximately another 225 g, not another 450 g. Fit the lid as your model directs, with the plunger raised.
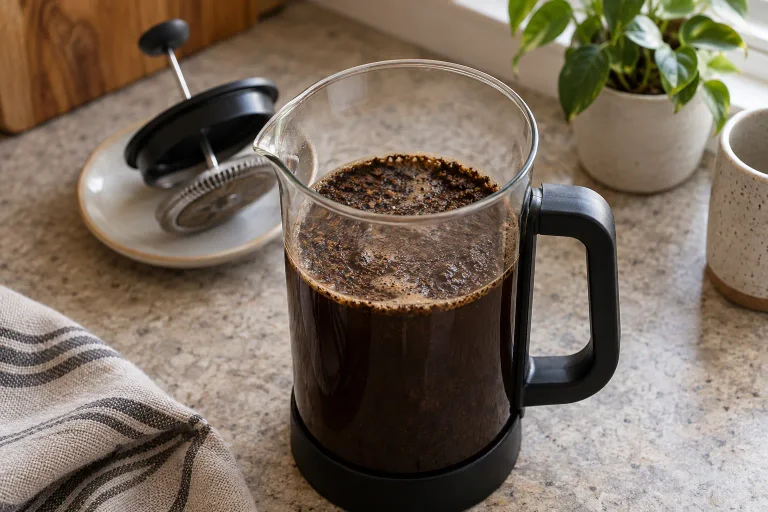
- Press at four minutes from the first pour. Move the press off the scale onto the stable surface. Hold it securely and lower the plunger slowly, without force. Stop if it jams; follow the manufacturer's obstruction instructions.
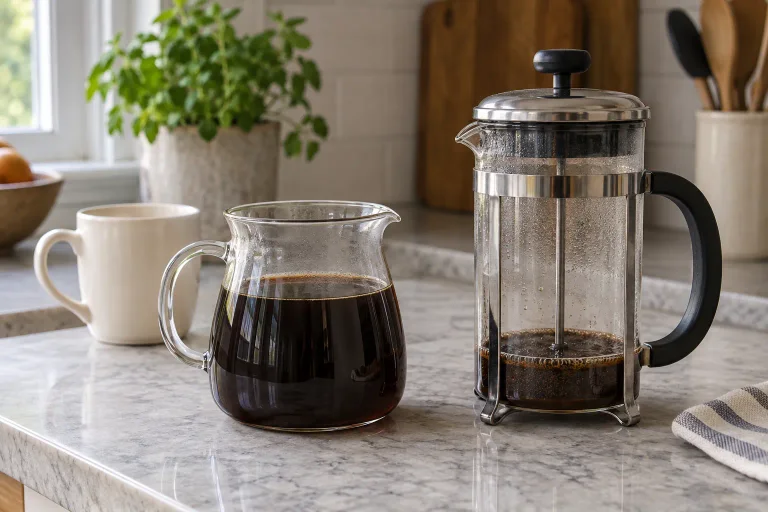
- Pour and serve. Decant the coffee you intend to drink into mugs or a separate vessel. Leave the muddy last portion behind if you dislike sediment.
Safety details vary. The Bodum Brazil manual calls for nonboiling water, at least one inch of headroom, a plastic stirring utensil and gentle pressure with the spout turned away. It prohibits stovetop use. Apply your model's instructions rather than copying the fill level or handling shown for another press.
If you accidentally overshoot the water, write down the actual quantity. With 30 g coffee and 480 g water, you brewed at 1:16. You can still assess the cup, but label the result correctly before using it to decide your next adjustment.
Keep the first brew simple: a four-minute timeline
| Timer | Action | What to check |
|---|---|---|
| Before starting | Prepare the press, grind and hot water | The scale reads zero with the press and dry grounds in place |
| 0:00 | Begin the timer and pour about 225 g water | All the grounds become wet |
| 1:00 | Stir gently and pour to 450 g total | Do not zero the scale between pours |
| 4:00 | Move to a stable surface, then press slowly | Use gentle pressure; stop if the plunger jams |
| After pressing | Pour into mugs or a serving carafe | The drink is separated from the bed of grounds |
The four minutes start with the first water, not after you finish the second pour. Set out everything before wetting the grounds so weighing beans, finding mugs or heating more water does not interrupt the recipe. The press and pour add handling time beyond the four-minute steep.
For a more useful comparison, taste a small sip once it has cooled comfortably. Note the coffee before adding milk, then prepare the drink you normally enjoy. Our coffee tasting guide helps describe sweetness, body and aftertaste without chasing elaborate flavor notes.
Choose a specific adjustment for the next brew
Correct a dose or fill mistake first. When those measurements are right, use this table to choose a small experiment rather than changing the whole recipe.
| What you notice | First comparison | What to look for |
|---|---|---|
| Pleasant flavor, too concentrated | Add 10 g hot water to the finished cup | The same character at a more comfortable strength |
| Enough strength, unpleasant sourness | Try a slightly finer supported grind next brew | Less sharpness without extra grit or difficult pressing |
| Enough strength, excessive bitterness | Try a slightly coarser grind next brew | Less bitterness while retaining enough flavor |
| Grit spoils an otherwise enjoyable cup | Pour gently and leave the last muddy portion behind | A cleaner serving without changing the recipe |
The grind suggestions follow OXO's taste-led troubleshooting. They are starting experiments, not proof that sourness or bitterness has one cause. If the change makes the cup worse, return to the recorded setting and check the beans, temperature and cleanliness before trying again.
Keep grind, temperature and timing repeatable
Begin with the coarse grind specified by your maker. The National Coffee Association's guide recommends coarse grounds and a burr grinder for more uniform grinding. “Coarse” is still a starting description: record the setting on your own grinder so you can reproduce it.
Numbers do not transfer between grinders. For example, the original Baratza Encore manual suggests setting 28 for French press, then says the actual setting needs adjustment. That is not an instruction for an Encore ESP or another brand. If buying a grinder, our grinder guide explains the choices; you do not need to replace equipment before measuring a first batch.
A kettle reading and the temperature inside the press are different things. Barista Hustle's temperature experiments show why vessel and batch size affect heat loss. Record the kettle setting rather than assuming a fixed wait after boiling works in every kitchen. Keep any preheating routine consistent and stay within your press's instructions.
Four minutes is a starting point for this method. Barista Hustle also describes a longer method that includes settling time. Try a complete alternative method separately; mixing its timing into this recipe makes the comparison harder to interpret.
Change strength without chasing every variable
Strength is the drink’s concentration; extraction concerns what the water takes from the grounds. A thin cup can still taste bitter, so adding coffee is not automatically the answer.
For an unexpectedly weak cup, check the scale’s tare, the combined pour total and any milk or serving water before adjusting the recipe.
There is no universal winning ratio. Blue Bottle's recipe uses 30 g coffee with 350 g water, about 1:11.7. The OXO GroundsLifter recipe card specifies 52 g for 946 mL, approximately 1:18.2. These are different starting recipes for different preferences and workflows, not proof that either is wrong.
To compare doses, keep 450 g water and the same beans, grind, timing and serving additions. Try 28 g coffee for a lighter dose or 32 g for a heavier one: approximately 1:16.1 and 1:14.1, respectively.
Troubleshoot the next batch, one change at a time
There is grit at the bottom
OXO explains that mesh leaves more fine particles than paper. Beyond the careful pouring described above, inspect the filter for damage or poor assembly. Obvious powder in the grounds calls for checking the grind; extra coffee will not repair filtration.
The plunger is difficult to push
Stop rather than leaning harder on it. Let the manufacturer's instructions determine what to do next; hot liquid under pressure is not a useful taste experiment. Check the supported grind and filter assembly before brewing again. Specialized presses can feel different: ESPRO's guide uses a linked dual-filter assembly and model-specific fill lines. Do not insert a paper filter into an ordinary press because another brand supports one.
The cup is weak, sharp, bitter or flat
If the adjustments above do not help, check cleanliness, water temperature, timing and the beans themselves. The coffee troubleshooting guide covers other possible causes.
Keep a specific note: “30 g / 450 g, usual grind, four minutes; preferred 20 g serving water.” Save successful recipes as well as problems.
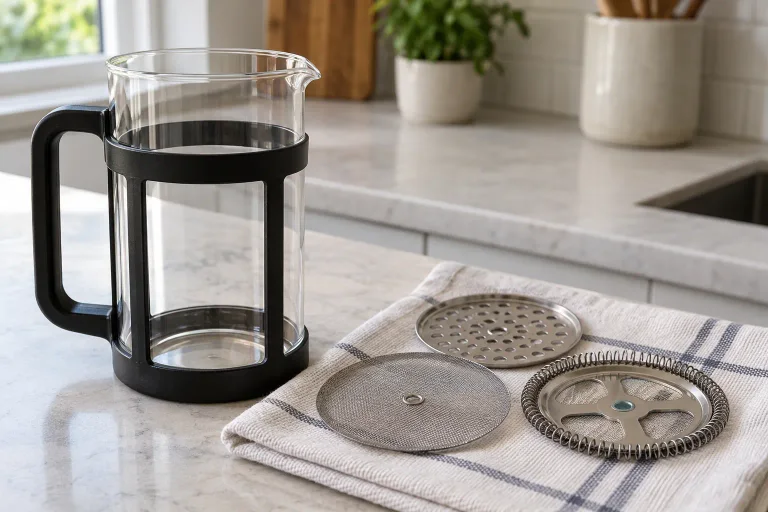
Clean the parts your model allows you to remove
Let the equipment cool enough to handle safely, remove the spent grounds and wash the beaker and filter after use. OXO recommends gentle soap and water followed by air drying. Follow your exact model's instructions for disassembly and dishwasher use. Do not force a bonded filter connection apart or remove a glass insert merely because a similar-looking model comes apart.
Inspect the filter before reassembly and check glass for damage. A clean setup also makes comparisons more useful: a new ratio should not have to compete with yesterday's residue. Our coffee-equipment cleaning guide separates washing from descaling and covers other brewers.
Common French press ratio questions
Can I use tablespoons instead of a scale?
Yes, as an approximation. The tablespoon chart gives estimates for 8, 12 and 16 US fl oz of water, plus our starting recipe and a batch for a 34 oz press. Use level measuring tablespoons consistently; weighing both ingredients gives you a repeatable 1:15 ratio.
Can I make one small cup in a large press?
Only if the batch meets that model's operating instructions and the filter works at that fill level. Scaling 15 g coffee to 225 g water preserves 1:15 mathematically; it does not change the height or travel of the plunger. Choose a press that suits your regular serving size rather than assuming every large vessel works equally well nearly empty.
Can I use pre-ground coffee in a French press?
Yes. Choose a coarse grind intended for the press when possible. Grounds sold for a drip machine may be finer and leave more sediment; espresso-fine coffee is a poor starting point for a standard mesh press. Follow the maker’s grind advice and never force a resistant plunger.
Should I leave coffee in the French press to keep it warm?
Pour the finished coffee into a separate serving vessel after pressing. An insulated carafe can keep a larger batch warm without leaving the drink over the grounds. Follow the vessel’s heat and fill instructions, and pour carefully.
Should I buy special French press beans?
Start with coffee you already enjoy and can identify, then record the bag and roast alongside your recipe. A label promising suitability for French press does not replace a dose measurement or grind instruction. Use the same bag for your first comparisons, and keep it stored consistently; our coffee storage guide covers the basics.
What should I change for tomorrow's cup?
If today's measured recipe tasted good, repeat it. If it did not, choose one problem and one adjustment. Keep the record short enough that you will actually use it: coffee, water, grinder setting, timer and one sentence about the cup. That turns a starting ratio into a recipe you can reproduce.